This is an old revision of the document!
Arma3Sync Setup
Step 1

- Grab Arma3Sync from Sons of Exiled or from our mirror here. It requires Java Runtime Environment, so install that if you don’t have it (there is also a link on the Armaholic page). Careful: the Java installer will prompt you to install the Ask Toolbar. Installing the Ask Toolbar is not necessary.
- Install Arma3Sync with its defaults.
- Navigate to the Arma3Sync directory (it defaults to
C:\Program Files (x86)\ArmA3Sync), right click on the Arma3Sync.exe, select “Properties” and check “Run this program as an administrator”.
Step 2
Open Arma3Sync. Accept updates if necessary. The updater is built into the app and works pretty well.
Step 3
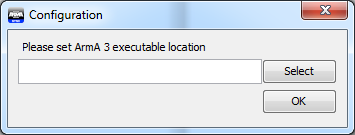 Find your Arma3 executable. It’s generally in one of the following:
C:\Program Files (x86)\Steam\steamapps\common\Arma 3\C:\Program Files (x86)\Bohemia Interactive\Arma 3\C:\Program Files\Bohemia Interactive\Arma 3\
Make sure arma3_x64.exe is part of whatever path you enter.
Step 4
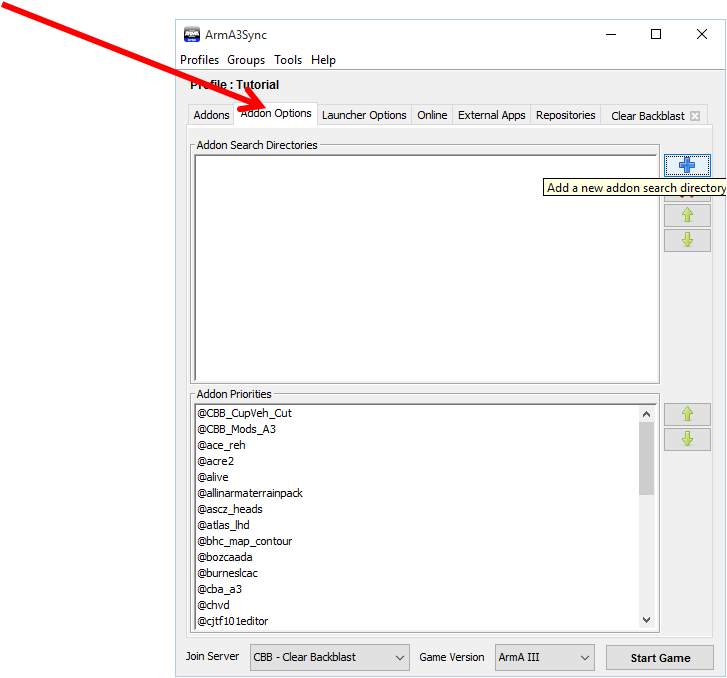 Add a default addon search directory. Click on the Addon Options tab, then the blue plus sign on the right and specify the directory containing your existing @ folders, if any, or where you’d like them to download to. Your addons may be in the default game directory, in which case you might add them again. If they are in a different directory, add that directory here.
Note, some of the mods we use may be different from versions found elsewhere. For example, in @ace we’ve pulled the ace_aircraft PBO because of conflict with RHS aircraft HUDs or in the RHS AFRF folder we’ve rolled in a hotfix to fix crashing issues with tanks. If in doubt, you could store CBB mods in their own folder away from any existing mods.
Step 5
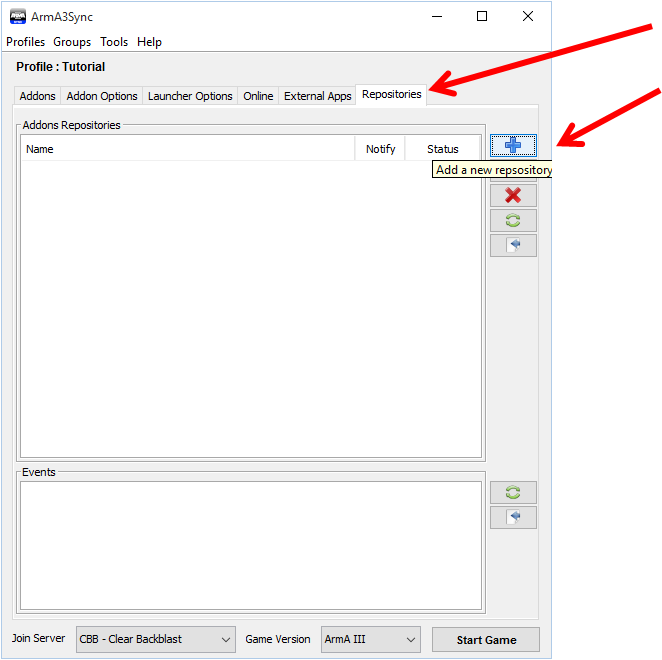
Click on the Repositories tab, then the plus sign to add the Clear Backblast repository.
Copy the Auto-Config url into the “Public auto-config url” box, click the Import button, and A3S will fill in the rest for you. Click OK and the repository will be created.
Required
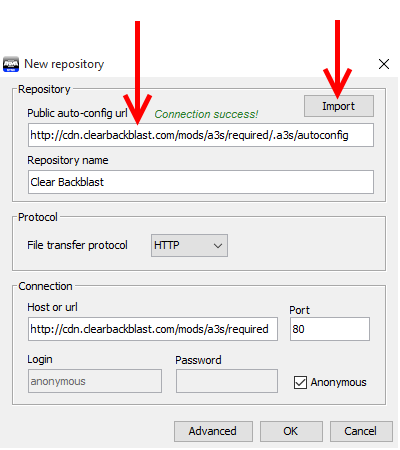
http://cdn.clearbackblast.com/mods/a3s/required/.a3s/autoconfig
Optional
The following are entirely optional mods you can also include, using the same procedure to create a repository for each of them as you do the with the required mods. You can find more information about them at the end of this document or just ask about them in Discord if you have any questions.
- Alive:
http://cdn.clearbackblast.com/mods/a3s/mod_alive/.a3s/autoconfig - DynaSound (sound mod):
http://cdn.clearbackblast.com/mods/a3s/opt_dynasound/.a3s/autoconfig- Not compatible with JSRS
- Enhanced Soundscape:
http://cdn.clearbackblast.com/mods/a3s/opt_ess/.a3s/autoconfig- Used in combination with Dynasound or JSRS
- JSRS4 (‘Apex’, sound mod):
http://cdn.clearbackblast.com/mods/a3s/opt_dragonfyre/.a3s/autoconfig- Not compatible with Dynasound
- Head Range Plus:
http://cdn.clearbackblast.com/mods/a3s/opt_hrp/.a3s/autoconfig- Note: Primarily for users with head-tracking software/hardware (Opentrack/Freetrack, TrackIR)
- No Crosshair:
http://cdn.clearbackblast.com/mods/a3s/opt_nocrosshair/.a3s/autoconfig - Immersive Addons:
http://cdn.clearbackblast.com/mods/a3s/opt_immersive/.a3s/autoconfig- The thread describing this mods features can be found here.
- Is this giving you an “Include file userconfig\LAxmann\L_Immerse.hpp not found.” error?
- Navigate to your @l_immerse folder and copy the ‘userconfig’ folder there into your root Arma 3 directory.
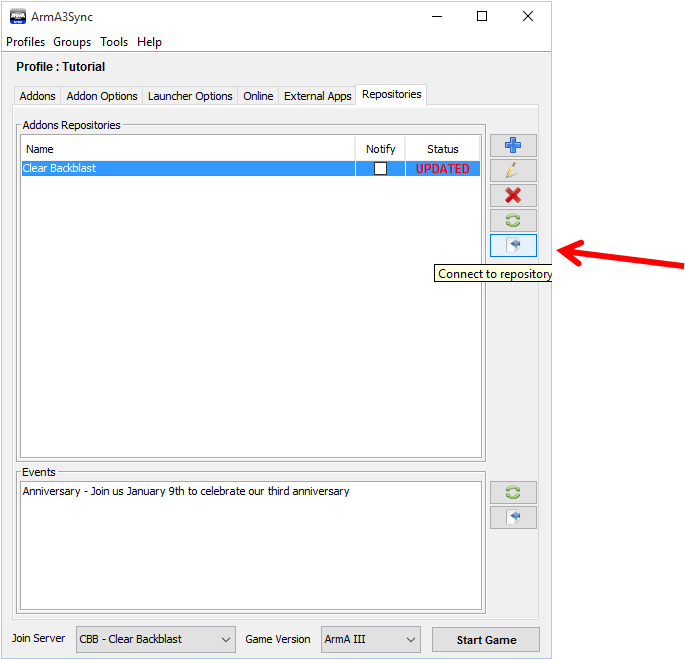
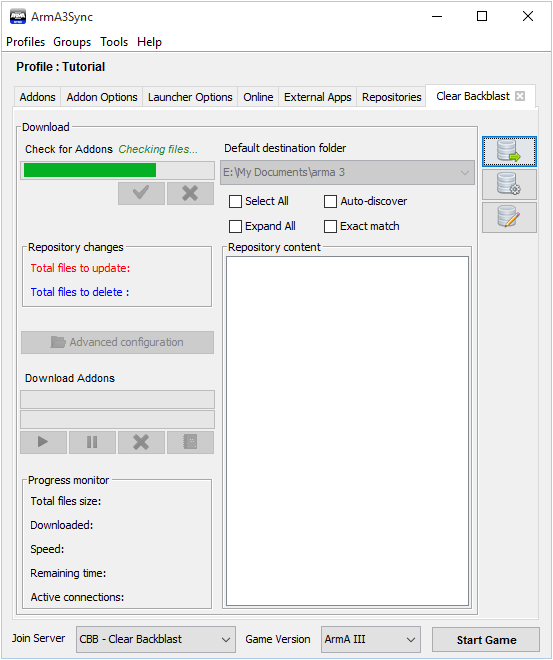
Step 6
If you check the 'Notify' box it'll notify on launching A3S when a repository has been updated.
Click on the “connect to repository” button.
The repository will open in a new tab. Click the green checkmark to start comparing your destination folder to the Clear Backblast repository.
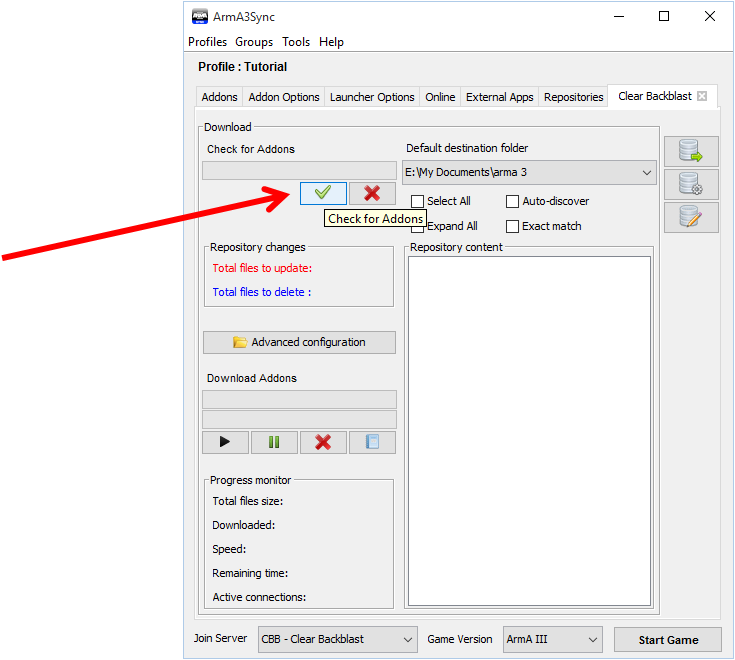
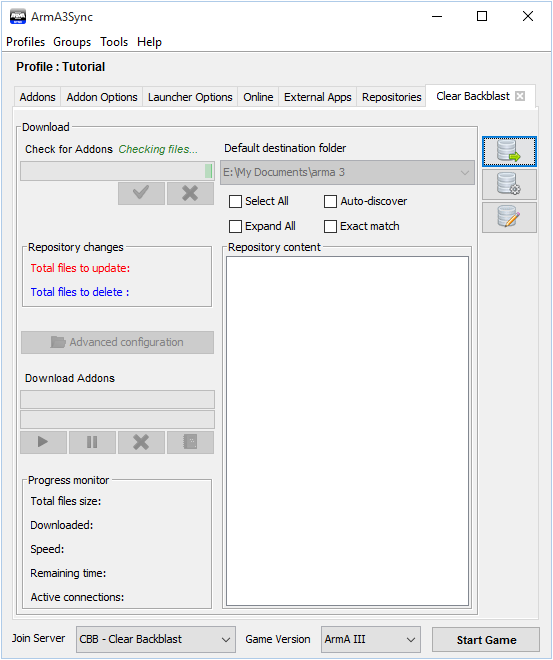
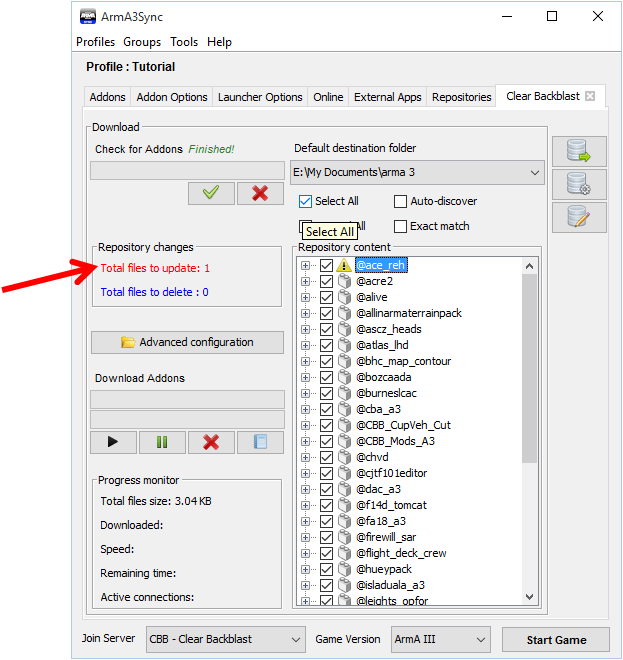
Almost there…
For playing with CBB you’ll want to check “Select All” to make sure everything is updated (in this example only one file needs updating).
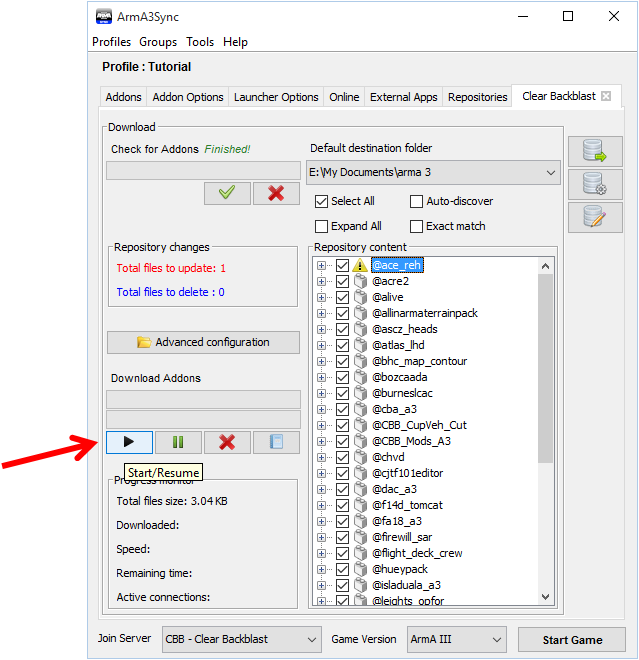
Click the “play” button (solid right arrow) under Download Addons and the download will begin.
Plan ahead for this download if your connection is slower as the required portion of the CBB repository is about 18 GB.
STEP 7
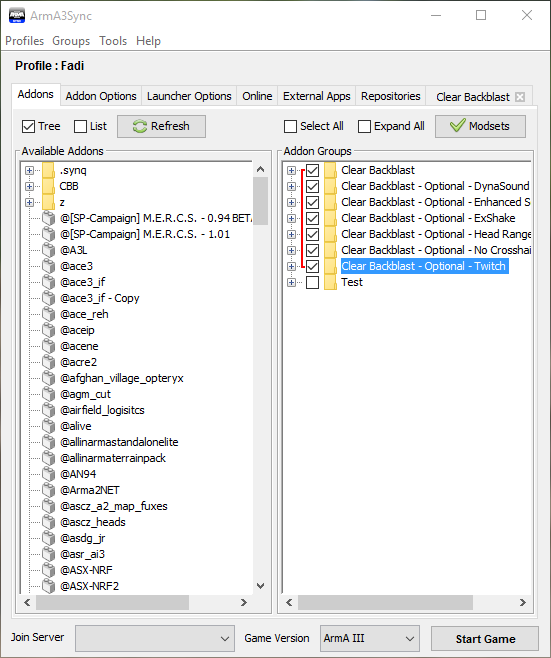
The next step is to create the mod groups that use each repository. Click the “Addons” tab and then click Modsets. If this button doesn’t show up, you may need to resize the window to make it a bit wider.
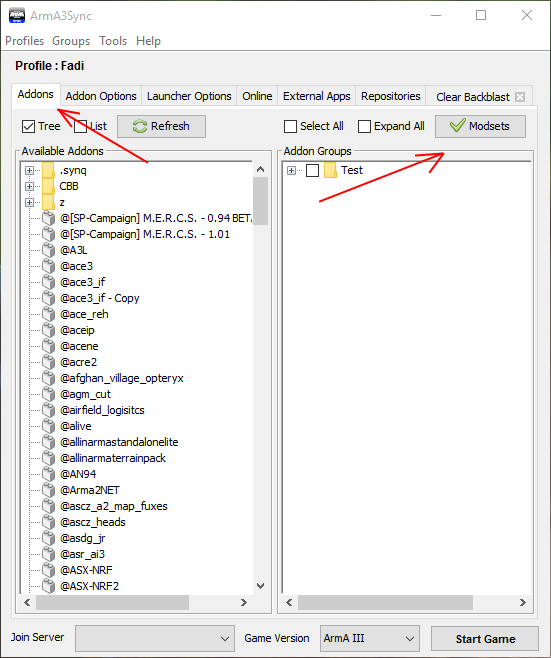
Check the boxes for whatever repositories you want to use and hit “ok”
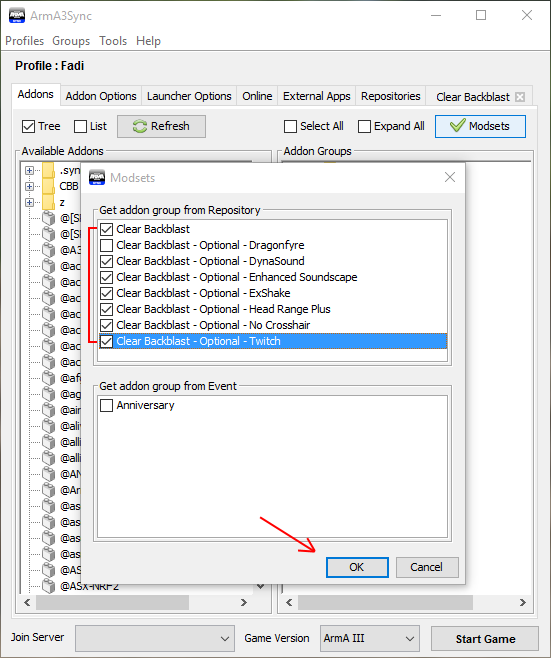
Now back in the main interface check whatever mod groups you want to launch the game with.
STEP 8
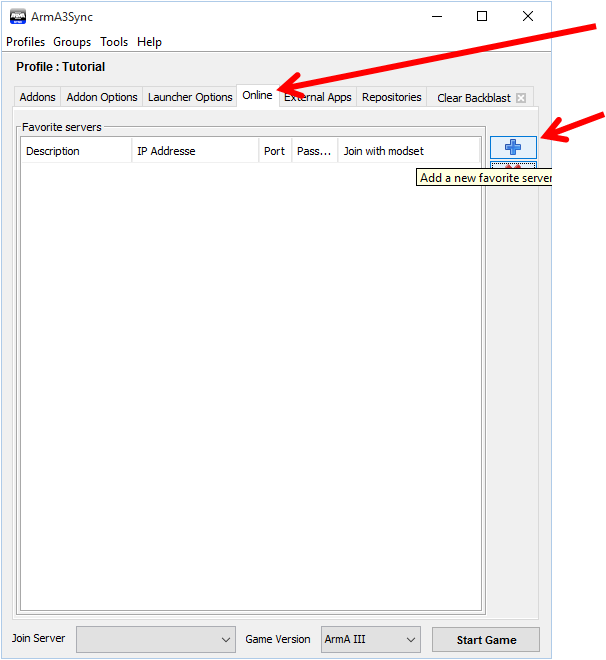
You can also set up Arma3Sync to automatically join the Clear Backblast server with the modsets.
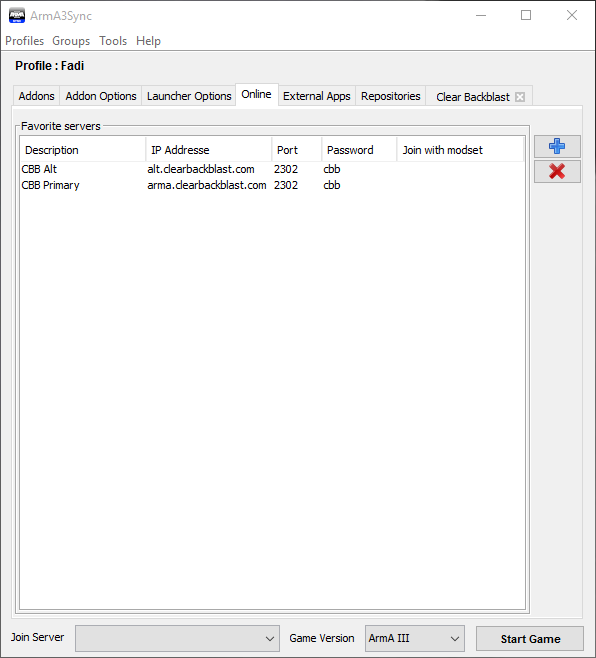
Go to the online tab and click on “Add a new favorite server.” It will add a generic text block to the list.
You can edit the generic server by double clicking the server fields and entering new values.
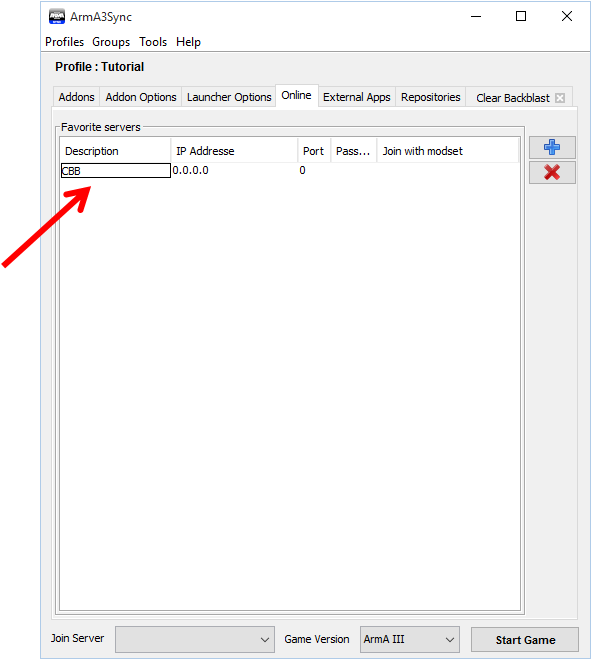
Set the values below.
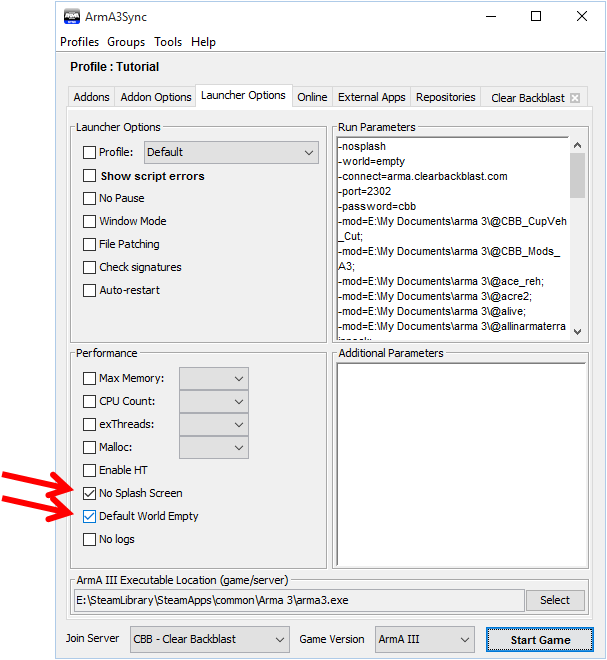
In the “Launcher Options” tab, you can set some additional checkboxes to get into the game faster, bypassing the splash screen and preventing some of the behind-the-menu animations.
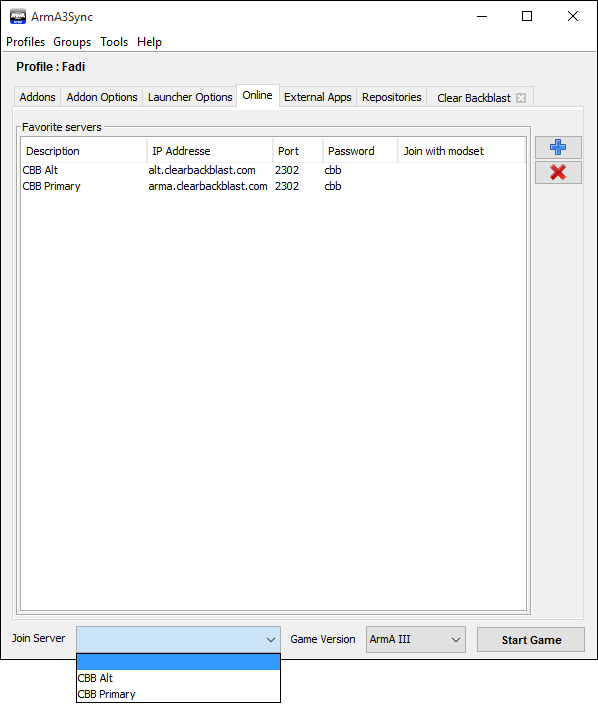
When you’re ready to jump in (after checking the Discord out), set the Join Server dropdown at the bottom of the application then click Start Game.
Teamspeak and ACRE
We use the Teamspeak VOIP software for in-game communication and the mod/plugin ACRE allows for realistic voice and radio behaviour.
The version of ACRE we were using is a dev build and is only compatible with the latest version of TS, which as of the time of this writing is 3.1.0.1.
Note: a Push-To-Talk key is required for Teamspeak; voice activation is not allowed.
STEP 1
You will be using the latest version of the Teamspeak VOIP software. This can be acquired on the downloads page on the Teamspeak site. As of this writing that is version 3.1.0.1.
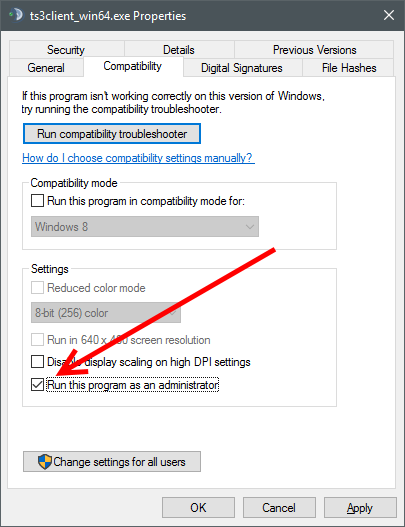
Navigate to your Teamspeak directory and check to make sure Teamspeak.exe will start as admin. Note: This is required and ACRE will not work properly without this step!
STEP 2
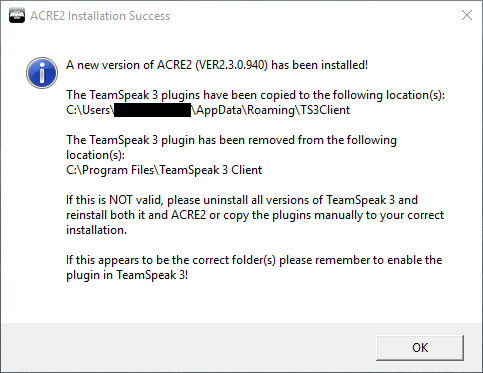
When you launch Arma, ACRE will detect if ACRE installed and if so, which version number. It will update the version accordingly and give you a prompt to hit okay.
STEP 3
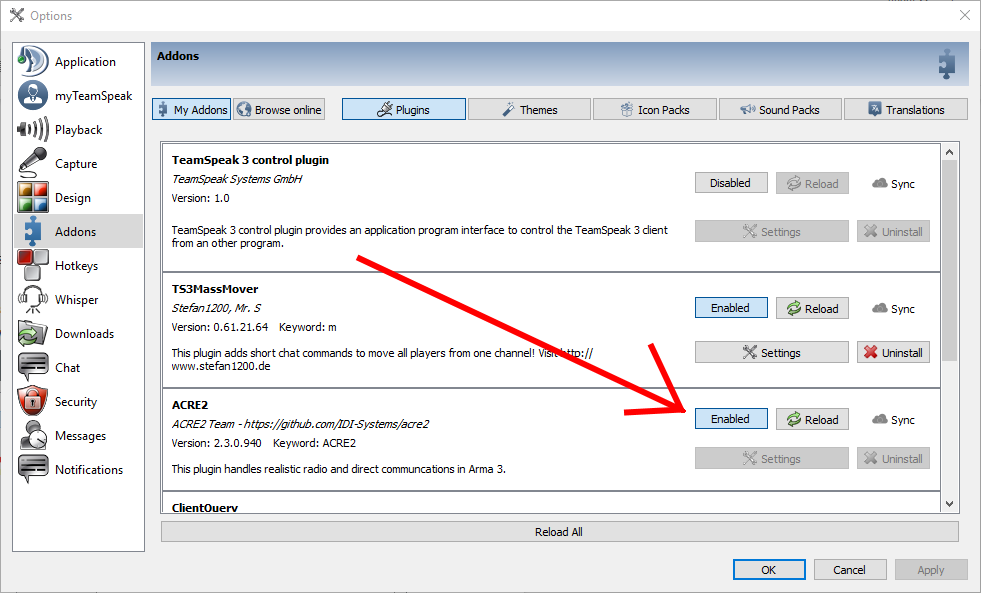
Open Teamspeak, select Tools → Options and then switch to the Addons tab..
You should see ACRE in the plugins section and it should be set to enabled.
STEP 4
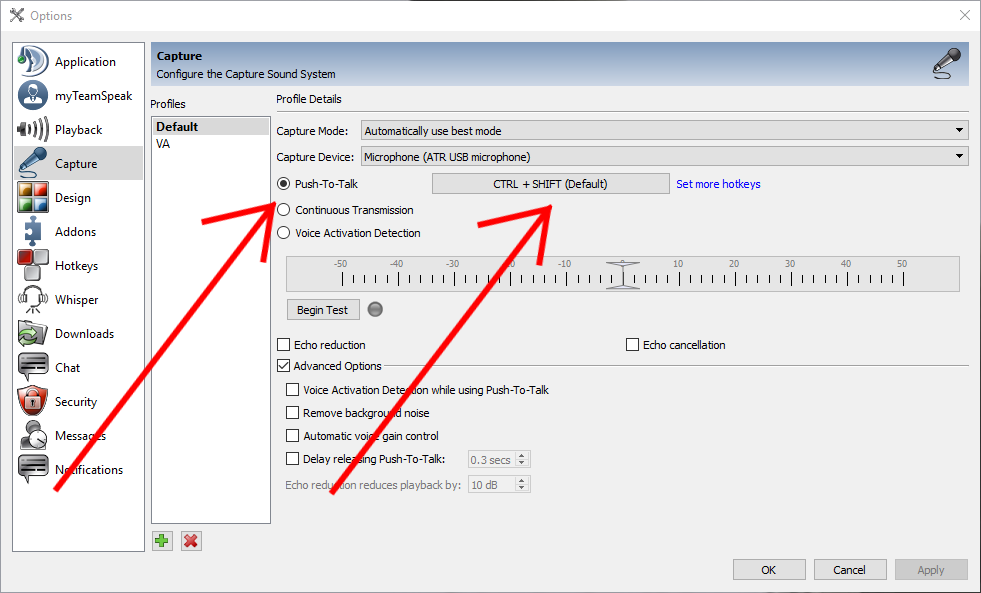
In Teamspeak, select Settings → Options, then go to the Capture tab.
Select Push-To-Talk and bind your key of choice. If you have spare mouse buttons, such as a Mouse4/5 or Forward/Back buttons, we strongly recommend one of these for Push-To-Talk.
Note: a Push-To-Talk key is required for Teamspeak; voice activation is not allowed.
STEP 7
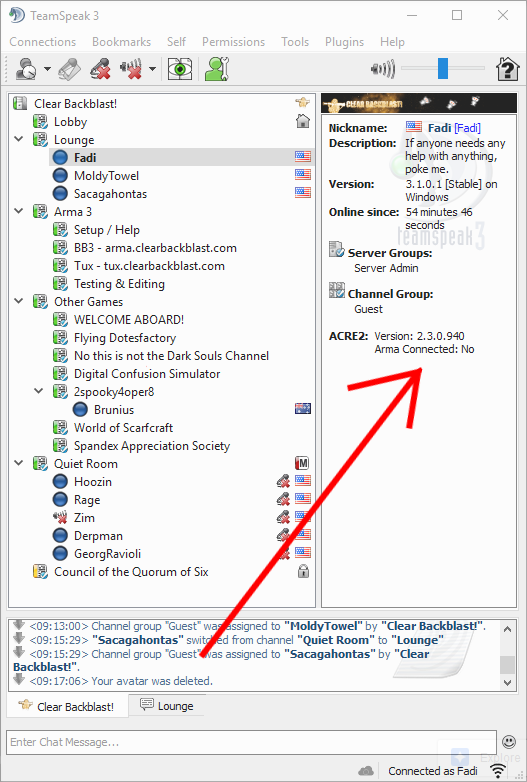
Our Teamspeak server address is ts.clearbackblast.com.
When connected to any server, make sure TS reports the ACRE2 version number, currently 2.3.0.940 as of 2/5/2017.